
diff options
| author | krakenrf <78108016+krakenrf@users.noreply.github.com> | 2024-07-18 13:13:32 +0200 |
|---|---|---|
| committer | krakenrf <78108016+krakenrf@users.noreply.github.com> | 2024-07-18 13:13:32 +0200 |
| commit | a6a8e77073b377a85d382f6c0828c02301c20985 (patch) | |
| tree | a8b3f2385b5d088899743af33f1d6ecaf90e798a | |
| parent | Updated 11. Kraken Pro Cloud Mapper (markdown) (diff) | |
| download | krakensdr_docs.wiki-a6a8e77073b377a85d382f6c0828c02301c20985.tar krakensdr_docs.wiki-a6a8e77073b377a85d382f6c0828c02301c20985.tar.gz krakensdr_docs.wiki-a6a8e77073b377a85d382f6c0828c02301c20985.tar.bz2 krakensdr_docs.wiki-a6a8e77073b377a85d382f6c0828c02301c20985.tar.lz krakensdr_docs.wiki-a6a8e77073b377a85d382f6c0828c02301c20985.tar.xz krakensdr_docs.wiki-a6a8e77073b377a85d382f6c0828c02301c20985.tar.zst krakensdr_docs.wiki-a6a8e77073b377a85d382f6c0828c02301c20985.zip | |
| -rw-r--r-- | 11.-Kraken-Pro-Cloud-Mapper.md | 36 |
1 files changed, 25 insertions, 11 deletions
diff --git a/11.-Kraken-Pro-Cloud-Mapper.md b/11.-Kraken-Pro-Cloud-Mapper.md index 895498b..72725ef 100644 --- a/11.-Kraken-Pro-Cloud-Mapper.md +++ b/11.-Kraken-Pro-Cloud-Mapper.md @@ -44,9 +44,7 @@ Under the device settings heading you should see an `APIKey`. Copy this value an  -Repeat these steps for as many KrakenSDRs as you are setting up. (Currently you are restricted to a maximum of three KrakenSDRs) - -### Setup your Local KrakenSDR Software +### Add the API Key to your Local KrakenSDR Software Next, you will need to set up your local KrakenSDR software via it's Web GUI. @@ -60,23 +58,33 @@ Change location source to `Static` and enter the Latitude, Longitude and Heading The settings should automatically apply and auto save. +Repeat the above "Create a Remote SDR Station" and "Add the API Key to your Local KrakenSDR Software" steps for as many KrakenSDRs as you are setting up. (Currently you are restricted to a maximum of three KrakenSDRs). + +### Creating a Group + +Next, you will want to group your KrakenSDRs. This step must be done, even if you are only going to create one group. + +The grouping feature allows you to separate KrakenSDRs into distinct groups. KrakenSDRs in each group will plot on the same heatmap. This is useful if you have KrakenSDRs spread out over a country. When triangulating, you will likely only want the KrakenSDRs local to a signal to contribute to the heatmap, as KrakenSDRs in another part of the country may point to a different transmitter. + +To create a group press the '+' button next to the 'Remote SDRs' text and click on 'Device Group'. Select a name for the grouping, and then select all the KrakenSDRs that you want in that group. + ## Starting the Mapper -A few second after entering the API key into the KrakenSDR web GUI as explained in the previous section, you should notice that the KrakenSDR on the cloud mapper turns green. +A few seconds after entering the API key into the KrakenSDR web GUI as explained in the previous section, you should notice that the KrakenSDR on the cloud mapper turns green. Once all your KrakenSDR's are green you can now start visualizing data by clicking on the "Start" button. -After a few seconds you should see the DOA lobe and bearing lines on the map. +After a few seconds, you should see the DOA lobe and bearing lines on the map. The heatmap should show up a few seconds later. ## Options and Features -### Main configure button (top right gear icon) +### Main configure button (blue gear icon at the top) -**Heatmap Size:** Total size from edge to edge in kilometers of the heatmap grid. Set appropriately for your expected search space. +**Heatmap Size:** Total size from edge to edge in kilometers of the heatmap grid. Set this appropriately for your expected search space. Too large and you will lose resolution. Too small and you may have difficulting visualizing the lobe intersections. -**Heatmap Resolution:** Number of cells per axis on the grid. A higher value can result in more precise TX localization. But setting it too high can make offline logfile calculations too slow. Maximum resolution is currently capped at 500. +**Heatmap Resolution:** Number of cells per axis on the grid. A higher value can result in more precise TX localization. But setting it too high can make calculations too slow. Maximum resolution is currently capped at 250. -It's important to note that setting a smaller heatmap size naturally results in a higher resolution grid too. For example, if you set your grid to 100km and resolution to 500, each grid cell has a size of 100,000/500 = 200 x 200 meters. +It's important to note that setting a smaller heatmap size naturally results in a higher resolution grid. For example, if you set your grid to 100km and resolution to 500, each grid cell has a size of 100,000/500 = 200 x 200 meters. Now if you set the grid size to 10km, each cell has a size of 20 x 20 meters. @@ -86,14 +94,20 @@ Now if you set the grid size to 10km, each cell has a size of 20 x 20 meters. If you double click on the map a menu will pop up. -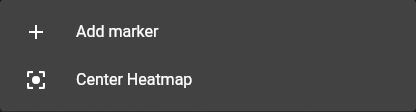 + **Add Marker:** Adds a reference marker on the map. Useful for marking to location of known transmitters. **Center Heatmap:** Centers the heatmap grid wherever you clicked. +**Set as Home:** Tells the mapper where the center home button should take you. + +**Copy Lat, Lon:** Copies to the clipboard the current latitude and longitude of the point you double clicked at. + +**Open in Google Maps:** Open the coordinates where you double clicked in Google Maps. This may be useful if you want to use street view. + ### Layer Options -Layer options can be accessed via the layers button  on the top left. +Layer options can be accessed via the layers button  on the top right. This allows you to choose between a light or dark street map, or a satellite image map. |